I'm really glad
The most common question that my photography students have isn’t really a question. But it IS more of a question and a statement rolled all in one!
“I can’t get my photos to look like I want to them. How do I make the way I see them in my head?”
Something tells me if you’ve dipped your toes in the photography education waters, you’re nodding your head right about now.
The truth is, there are multiple ways to answer that question. I know, I know. But, there is a way to find a solid starting point to answer this question.
Here’s the photography tea: to make your photos look the way you see them in your head, you gotta start at the end goal of your photo…and work backwards.
Let’s get into it by breaking down ways to describe the images you want. These are all real examples of what not only students have said they want to achieve, but what clients have discussed with me that they want to achieve. We leave the technical jargon outta the goal piece so we can get the creative process started.
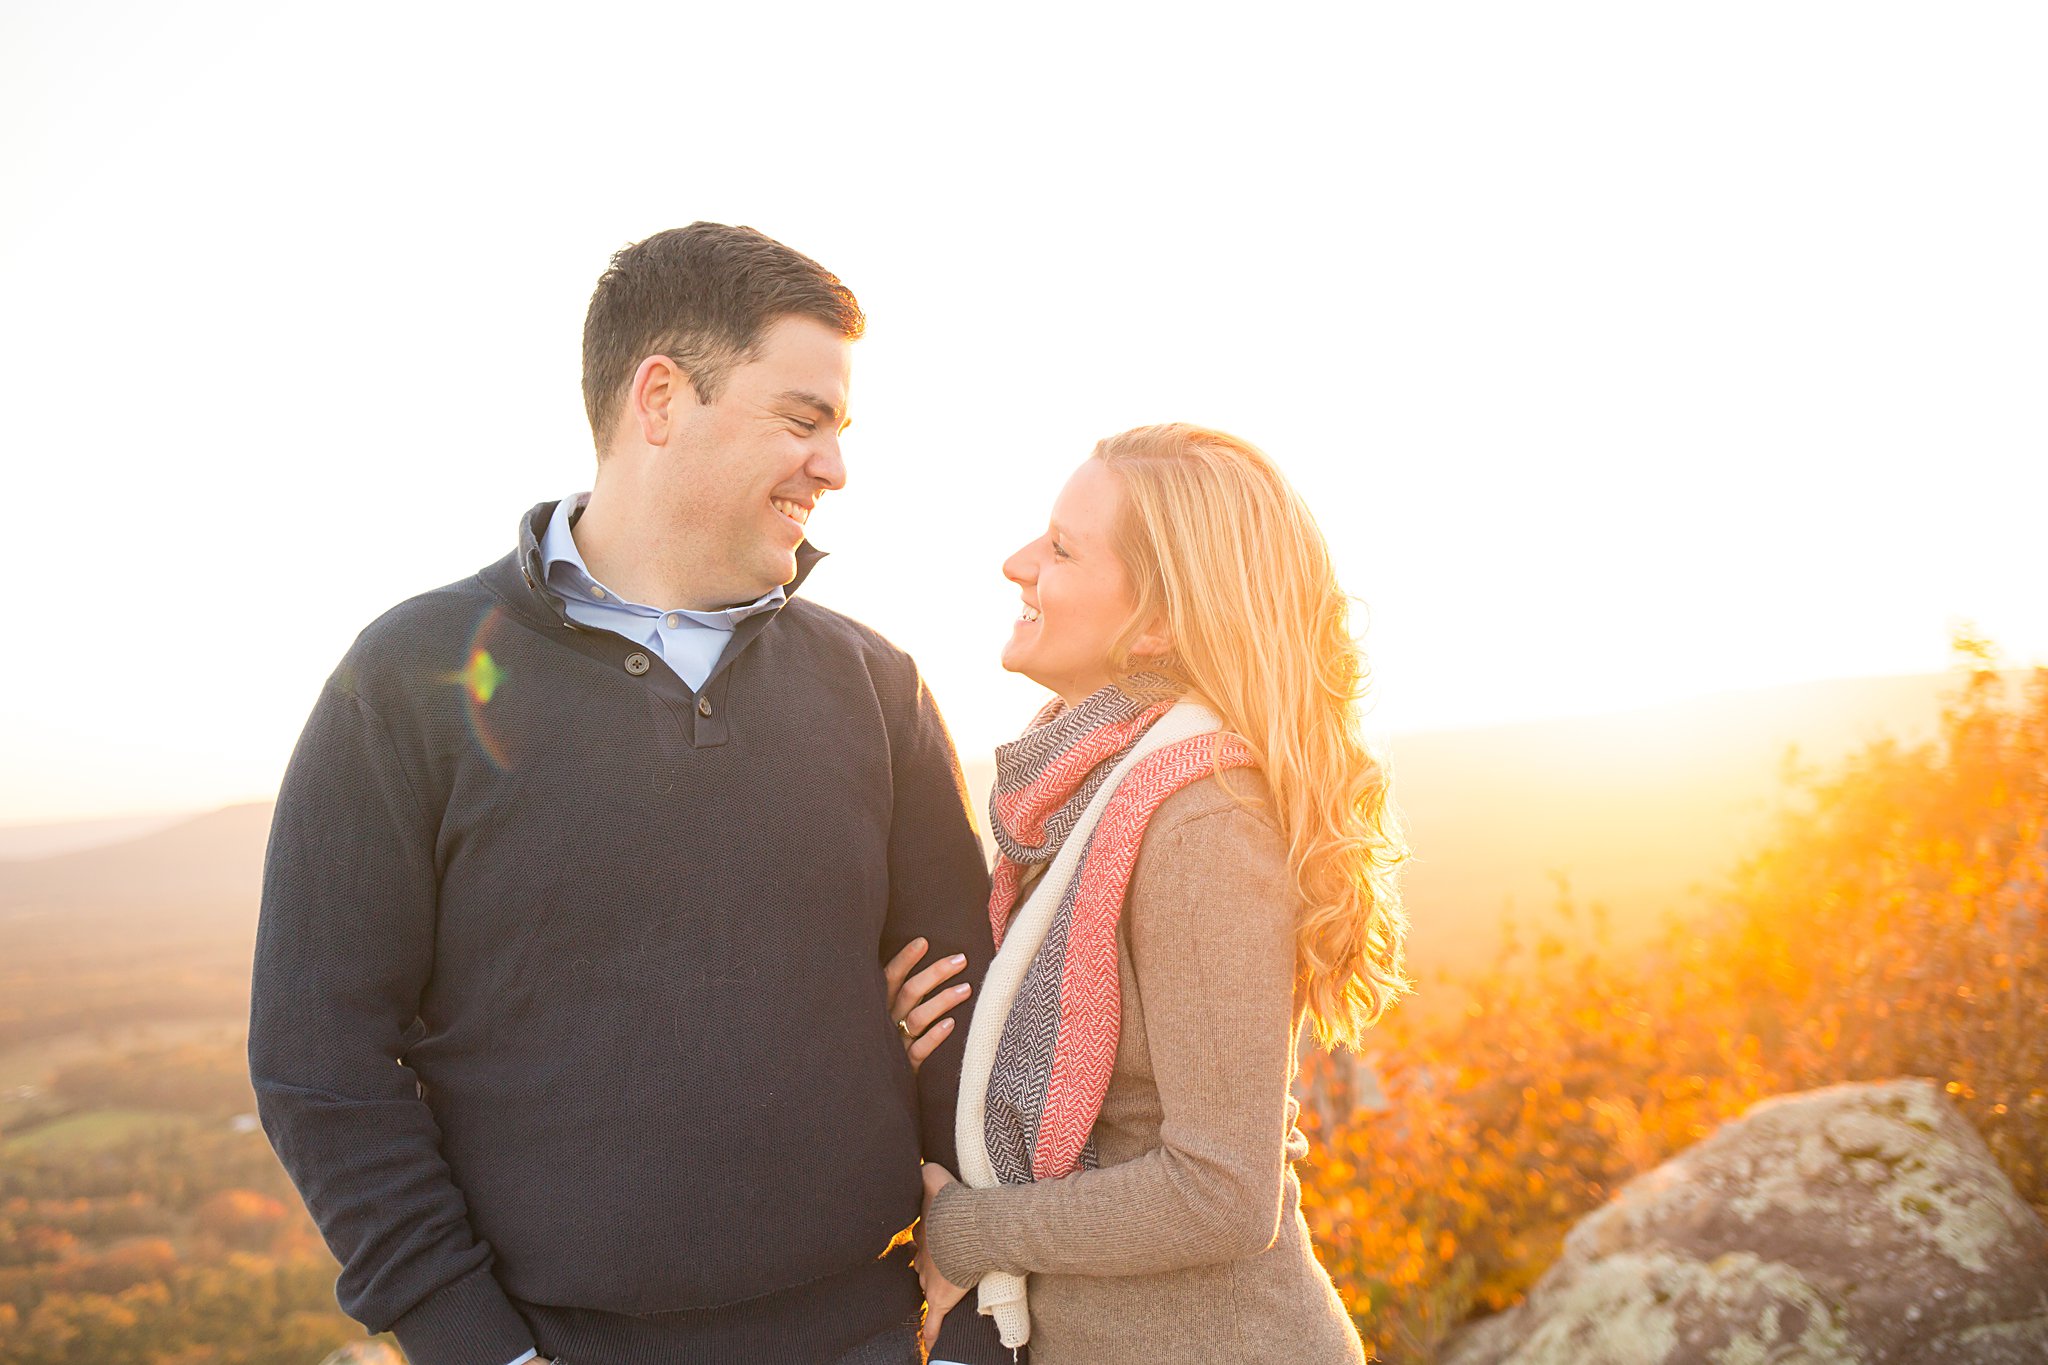
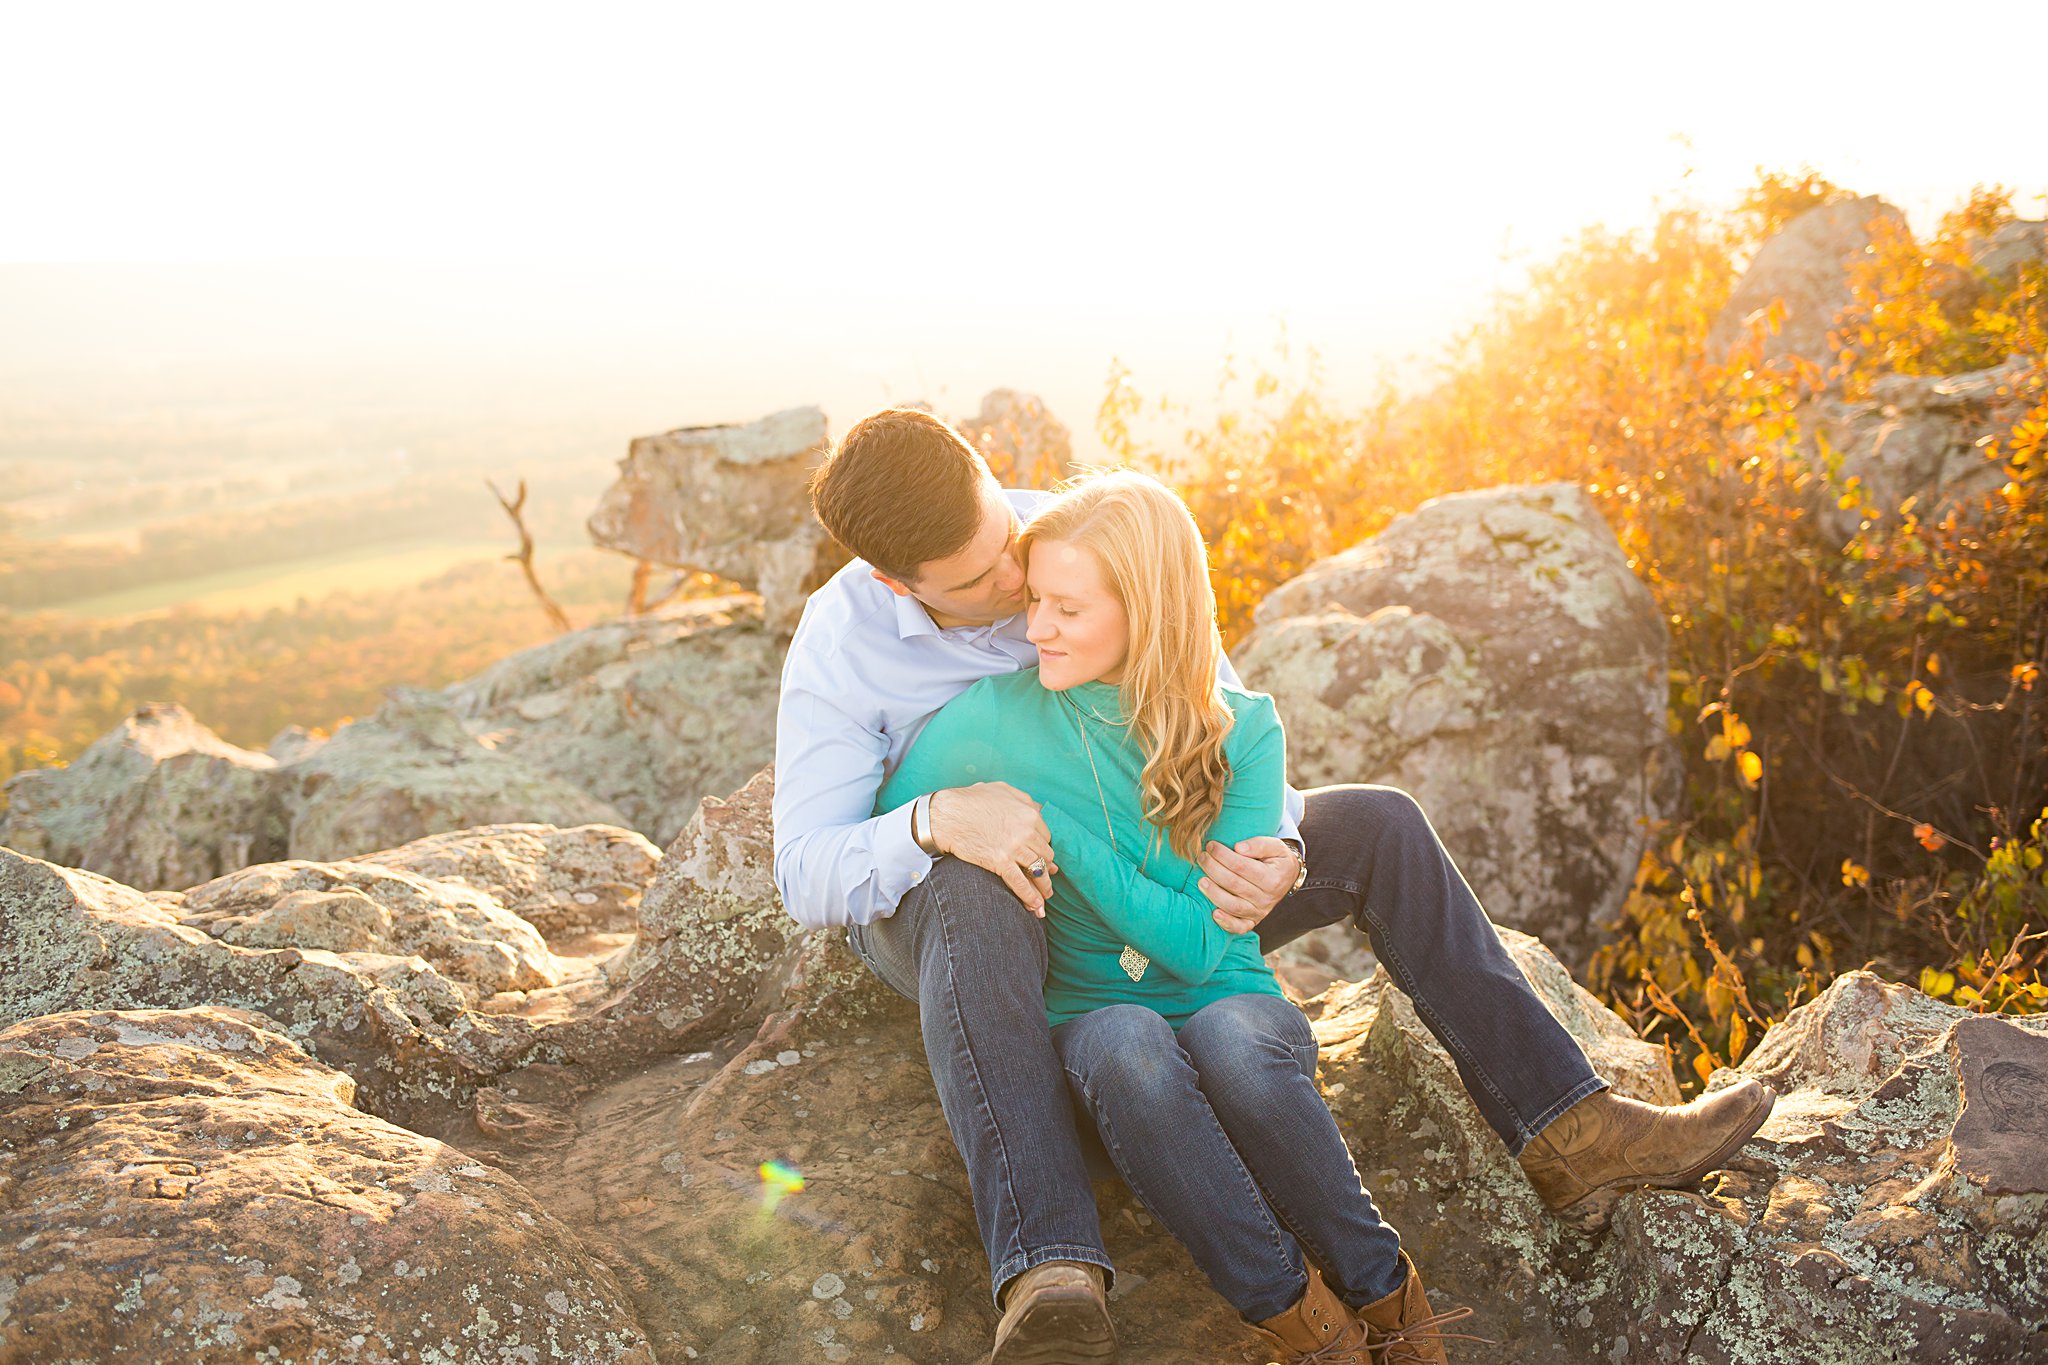
Here is the NUMBER ONE end-goal photo clients not only ask for, but students ask to learn how to take.
YOUR GOAL: You’re craving a warm, glowing, outdoor portrait photo. You want deep, bold, colors, and a creamy, blurry background. You want your subject to be nice and sharp.

EXCELLENT. Now, let’s talk about how the heck to get there.
PROCESS: Warm, glowing photos are made up of a few things.
How to get the glow: The time of day drives the the type of light we have. And, the type of light we have, is the most important aspect to consider. The most dynamic and warmest (read: glowy) light, is going to be about an hour before sunset or just before sunrise. The position of where the sun is on the horizon line, is what will drive the majority of the glow factor of the photo.
To get a glow, you need to have your subjects back facing the sunset/sunrise. This is called backlighting, and is key to this style of photography. Backlighting means the subject is being light from behind with whatever light source you’ve got.
LOCATION plays a huge, huge, huge factor in this part of the process. Wide open spaces lend to a lot of light. Think of the last time you saw an epic sunset or sunrise view. Where were you? The ocean or lake, on-top of a mountain or hill, a big empty field, a rooftop patio. All of those places have a ton of space, and a horizon line you can clearly see the sun dipping in or out of.
In camera light temperature is another factor to consider. In super simplified terms, light temperature is how yellow or blue your photos look. This is measured by a numerical system in your camera called the Kelvin system. Basically, the lower the number, the more blue (cool) your photos will appear. The higher the number, the more yellow (warm) your photos will appear.
Generally speaking, if you backlight your subject during sunset or sunrise, you’re going to have the warmest light around them. Not necessarily on them. You want to photograph this scenario with a higher Kelvin number, which you can adjust in your camera (depending on the model of your camera body). This will make your subjects warmer.
You can adjust this setting while editing your photos in Lightroom or camera raw in Photoshop. But. A strong word of caution. If you start to think you can adjust things later in editing, you are gonna have one heck of a time later on down the road. Getting something done RIGHT with your camera settings, is key to not only a faster editing work flow, but learning the actual meat and potatoes of photography.
The more you know about your camera and photography, the easier the concepts start becoming and the faster you can apply them to your photography practice.
How to get your subjects in focus and your background blurry: It starts with where and how you are positioning your subject in relation to the light source.
If that sun is just above your subjects shoulder near the horizon light, the further you position your camera lens towards that light, the more of that light is going to enter your lens. This is important because you can get haze with your sunshine, which can be absolutely beautiful, but you have to know where to position it, so your subject is still in focus.
Why?
Too much light entering your camera, especially with backlighting, is a notorious pain point for achieving a sharp focus. It basically tells your camera that it doesn’t have enough to focus on, so, it just doesn’t. But don’t worry. This is something you can achieve by positioning your subject slightly to the side of the sun as it lowers on the horizon. You can also correct this issue by positioning your camera with the sun in the corner of the frame, instead of directly behind it.

Focus is MORE than where you point your camera. Focus is driven by multiple factors with your camera settings for every single photo you take. This is where we get into some of the technical aspects of photography that will make or break your images.
Aperture: Every lens has the ability to open and close a certain amount. Not all lenses are created with equal aperture capabilities. This is a main component of why people select different lenses!
Aperture is represented in your camera as a series of numbers. You’ve probably seen something on the back panel of your camera that looks like f 1.4, f 2.8, f 4.0. That is the aperture of the lens.
How aperture works: Think about how an eye opens and closes. The wider that lens opens, the more light pours in. If you keep your eye open for longer than usual (think about staring at something a few feet away), the background starts to get a little blurry. Even when you simply look at one object in a group, everything else behind it, looks less in focus, right?
That’s a really simple baseline explanation. The wider the lens is open, the more light you get, and, the more in focus the thing you’re focusing on becomes…which means the less in focus everything else behind and around it becomes.
This is where we gotta be careful, though. If you’re thinking, “cool! I’ll just photograph everything with a wide aperture and my subject will be sharp and my background will be blurry”, hold your horses!
Remember when I said too much light can make your photo unfocused? Annnnnd remember when I said the wider open your aperture, the MORE light enters your lens? Yup. Too much light and too wide of an aperture can shatter your glowy goodness dreams and give you an overexposed and unfocused photo.
If you’re looking for what number to set your aperture at, it depends on the type of lens you’re using, your shutter speed and iso settings, where the sun is, how dark or light it is, and how many people, or subjects, you are photographing. A very general rule of thumb, is to set your aperture number close to the amount of people or subjects you’re photographing. This is assuming your subjects aren’t moving or wiggling around AND you’ve got your distance from the subject at the appropriate length.
There is NEVER going to be a time where I, or any other photographer, can tell you any of the exact settings of a photo you’re trying to create, and have it be exactly right, every single time.
Why?
Because every single situation is different. Even if you are photographing the same subjects, at the same time of day, for days on end. The environment will always throw you curve balls, and that’s why learning the foundations of photography to apply them in real life, are so important. Even if you are only photographing two people, at sunset, on top of a mountain, in the fall. Things will always change!
We’ve got one last detail that can really help how sharp your photos are. And that is the method you focus with and the type of focus setting used.
The one thing that changed my photography practice forever, was using back button focus.
Back button focus takes the ability to focus off of the shutter button, and assigns it to another button (usually on the back of your camera body).
This completely eliminates the need to mess with any manual focus toggles in camera. Instead, you’re choosing your focal point every single time, without your eye leaving the view finder. Staying in camera, means photographing more moments, and not missing a thing messing with settings.
I’ve got a tutorial qued up and waiting to release later this month. All you have to do is go here to get it delivered to your inbox!
This is something that I am so passionate about sharing with other photographers, and a tool I know you will find incredible value in!
Now that you’ve got the goods, I’m ready to see your work! Get out there and try them out for yourself. When you do, let me know! I’m ready to problem solve and get you on your way to creating images you love!